Showing posts with label Home Decor. Show all posts

Tuesday, August 14, 2012

Grad Frame

It's My Graduation Present to ME!
Designed for Oh My Crafts
Wahoo! We finished together.

Supplies Used:
 

Twelve Timbers : 4”x6” Frame | Rangers Ink : Jenni Bowlin Acrylic Paint Dabbers - Fountain Pen and coordinating color   | Oh My Vinyl : Metallic Silver, Black and Transfer Tape | Kanban Crafts : Duo Mirror Reflective - Copper/Black | Cricut : Happy GraduationSongbird, and Base Camp Cartridges | 7Gypsies : Display Trim: Loops and Hooks - Antique Silver | 
Graduate’s Tassel


Instructions:
 

1. Remove the glass from the frame.
2. Paint the frame with Ranger Ink paint dabbers and let dry. Paint the entire frame black, or paint the sides the color of the graduate’s tassel or school colors.
Tip: Ranger Ink Paint Dabbers dry super fast and are quick and easy to apply.


3. With Cricut machine, cut out the following: 

Cartridge
Material
Words to Cut
 Size in Inches
Blade Depth
Pressure
Speed
Happy Graduation
Metallic Silver Vinyl
"Happy Graduation"
3 1/2
4
Low
Medium
Songbird
Metallic Silver Vinyl
"Class Of"
1 1/2
4
Low
Medium
Base Camp
Metallic Silver Vinyl
"2011" Shadow
1 3/4
4
Low
Medium
Base Camp
Black Vinyl
"2011"
1 3/4
4
Low
Medium
Happy Graduation
Kanban Reflective Paper- Black
Graduation  Cap
3 1/2
4
High
Medium

4. With “Happy Graduation” cut off the “Happy” so you are left with “Graduation.” Do not forget to cut off the dot to the “i.” 
5. Using transfer tape, apply the vinyl to the frame. Start with “2011,” laying one number down at a time. Then stick “Graduation” down at the bottom, bringing it close to, but not touching the “1”. Lastly, apply “Class Of.” Since these letters are not welded together, apply each one separately, but overlap them slightly so they are close together and they look welded. 
6. Ink the white edges of the graduation cap black and adhere to the top left corner of the frame. 
7. Adhere one antique silver 7 Gypsies hook onto the graduation cap and tie the graduate’s tassel on. 
8. Insert the glass and graduate’s picture in the frame for a perfect graduation gift!

Worth Remembering Boxes


Paper Covered Boxes
Designed for Oh My Crafts

Supplies Used:
Petersen-Arne : Craft Pedlers Paper Mache Set Box Round Small Kraft set of 3 | Bazzill Basics : Worth Remembering 12”x12” Assortment Pack | Bazzill Basics : Worth Remembering Pretty Buttons | EKSuccess : Harmony Hotfix Assortment | Oh My Vinyl : Cloud White and Cherry Red | Sizzix : eclips Cartridge - Flowers & Phrases | Sizzix : Originals Die - Frame and Medallion | Tulle

Instructions:

1) Cover each box with a different patterned paper from the Worth Remembering Assortment Pack. It was helpful to use the Martha Stewart Circle Cutter to cut the circles for the tops of the lids since it cuts quickly and precisely.

2) Add embellishments such as the EK Success crystals and red and white vinyl flowers cut from the eclips cartridge.

3) Die cut a frame and medallion and add a Pretty Button to the top. Tie tulle through the button and tie together at the top.


Static Cling Vinyl


Oh My Crafts: High Static Cling Vinyl Project Ideas
Designed for Oh My Crafts

Oh My Crafts High Static Cling Vinyl is a high-grade professional vinyl that sticks without adhesive to smooth, glossy surfaces such as windows, mirrors, plastics and many other materials.  The High Static Cling Vinyl is flexible and thin enough to cut with any standard electronic cutting machines.  Assembly is easy and can be removed and re-applied effortlessness, making it great for seasonal window displays, home décor, decals, signs and many other creative ventures.  

Applying Static Cling to a Window from the Inside
(Use this technique for window displays and car decals)
Example: “No Soliciting” Sign

Supplies:
·         Oh My Vinyl: High Static Cling
·         Oh My Vinyl: Desired Colors and Transfer Tape
·         Silhouette SD Machine and downloadable “No Soliciting”
Instructions:
1.       Cut out phrase or image such as “No Soliciting Except for Girl Scouts” with vinyl.
a.       Tip: With tinted windows use bright colors so the image will show through.

2.       Weed vinyl, leaving the phrase/image on the liner.
3.       Press transfer tape onto the phrase/image and transfer onto the static cling.
4.       Peel off transfer tape.
5.       Trim the static cling leaving a thick border around the phrase. 
6.       Peel off static cling from liner and apply to window from the inside.

Applying Static Cling from the Outside Using Only a Few Colors Vinyl
(Use this technique when applying to mirrors, picture frames, home décor, etc…)
Example: Sailboat Display and Mustache Mirrors

Sailboat Display

Supplies:
·         Oh My Vinyl: High Static Cling
·         Oh My Vinyl: Turquoise Blue, Mint Green, Tangerine, Peanut Butter, Cloud White
·         Silhouette SD Machine and downloadable Sailboat from Silhouette Studio
Instructions:
Step 1: Mount Vinyl
Mount the base layers of vinyl to the static cling (Mint Green, Tangerine, Peanut Butter, and Cloud White).  If bubbles appear, poke a small hole at an angle with a push pin through the top layer to release the air.
Step 2: Cut and Layer
Cut vinyl with electronic cutting machine and layer any necessary pieces (turquoise blue on cloud white).

How to Cut High Static Cling + 1 Layer Vinyl
With Electronic Cutting Machines
Machine
Blade Depth
Pressure/Thickness
Speed
Silhouette SD
.3mm (Pink blade)
33
3
Eclips
4
2
3
Cricut
4
High
Low
Step 3: Apply
Peel off liner from the static cling and apply to the mirror, shower door, bathtub, or any smooth and glossy surface.

Mustache Mirrors

Supplies:
o   Oh My Vinyl: High Static Cling
o   Oh My Vinyl: Ebony
o   Silhouette SD Machine and downloadable Mustache Set from Silhouette Studio
o   Mirrors

Instructions:
o   Apply 8”x8” square of black vinyl to the high static cling.
o   Cut with Silhouette SD Machine.
o   Peel off static cling from liner and apply to mirror.

Applying Static Cling from the Outside
(Use this technique for conserving vinyl when applying to mirrors, picture frames, home décor, etc...)
Example: Static Cling Paper Dolls

Supplies:
·         Oh My Vinyl: High Static Cling
·         Oh My Vinyl: Desired Colors
·         Eclips Machine and Cartridge: Dress Ups

Instructions:
1.       Cut out images (clothes, accessories, body) out of vinyl at 6”.  To cut faces on the bodies, use the laser-cut preview before cutting to determine the correct location.
2.       Layer clothes and accessories that should be permanent (such as the white ruffles on the blue dress).
3.       With static cling, cut out the base layers and mount the coordinating vinyl images on top. (For example, I cut the skateboard out of brown vinyl, layered the green vinyl strip on top, cut the skateboard with static cling and transferred the skateboard to the static cling.)  By the way, static cling does not stick to the non-adhesive side of vinyl.
4.       For the bodies, place them behind a frame (with a plastic instead of glass) or attach the bodies to the clipboard with static cling vinyl.


h


Paper Covered Pencils and Pencil Holder


Paper Covered Pencils and Pencil Holder
Designed for Oh My Crafts

Paper Covered Pencils

Supplies:
·         Pencils
·         Paper: Anna Griffin: Carmen Collection Paper Pad
·         Mod Podge

Instructions:
1.       Cut a strip of paper 1”x 6 ¾” (or the length of pencil). 
a.       Tip: It is easiest to cover the pencils with thin, one-sided paper.  Double-sided paper is typically less flexible and consequently harder to wrap around the pencil.
2.       Brush Mod Podge onto the strip of paper.
3.       Wrap paper around the pencil.
4.       Brush Mod Podge on paper again to seal.
5.       Let dry before sharpening.

Pencil Holder
Supplies:
·         Tin Can
·         Paper: Anna Griffin: Carmen Collection Paper Pad
·         Imaginisce: Glam Rocks
·         Tim Holtz Adirondack Alcohol Inks
·         Mod Podge
Instructions:
1.       Alcohol ink the tin can on the inside and the outside rims.
2.       Cut paper 4”x10” (or the size of the can)
3.       Brush Mod Podge on paper and apply to can.
4.       Add embellishments such as glam rocks.


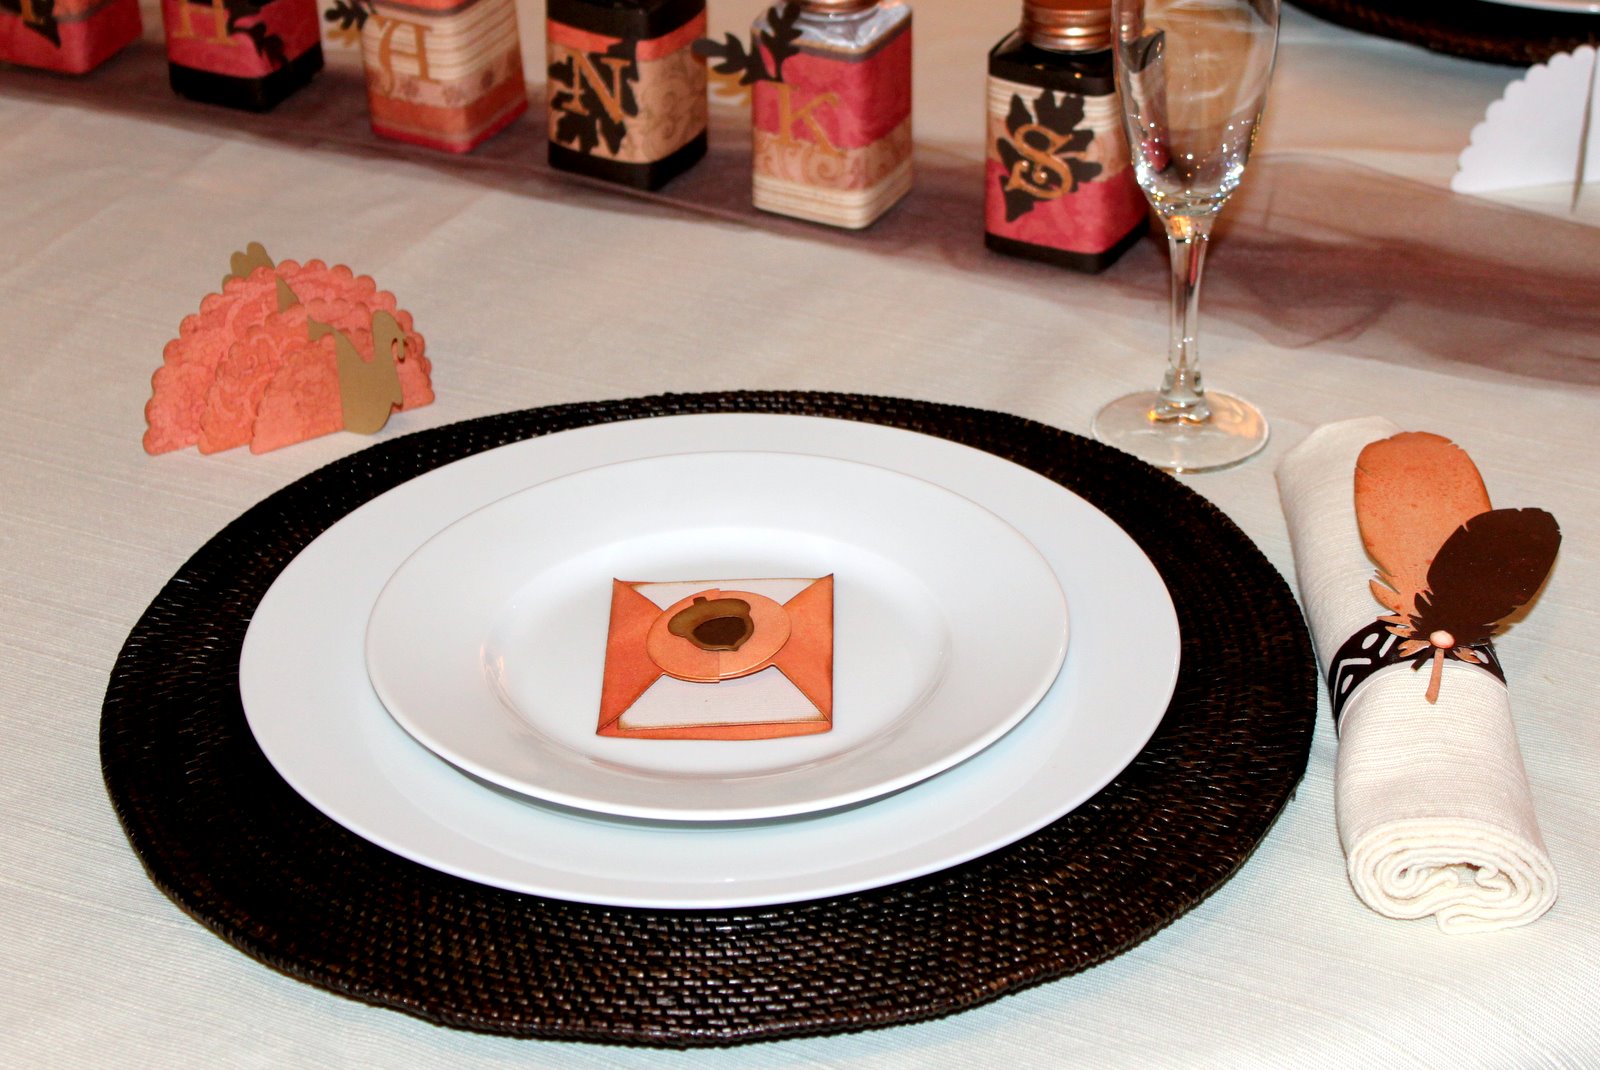
Thanksgiving Table Decor
Featuring Lifestyle Crafts “Be Stuffed” Dies
Designed for Oh My Crafts


Paper Turkey

Supplies:


Instructions:
  • Die cut Turkey wings with the Epic 6, Big Shot/BigKICK, Vagabond, or Cuttlebug machine and paper from the Fall paper pack.
  • Die cut Turkey body with Kraft paper.
  • Place wings into the slits of the body.
  • Optional: Ink the edges of the turkey with a brown ink pad, if desired.  


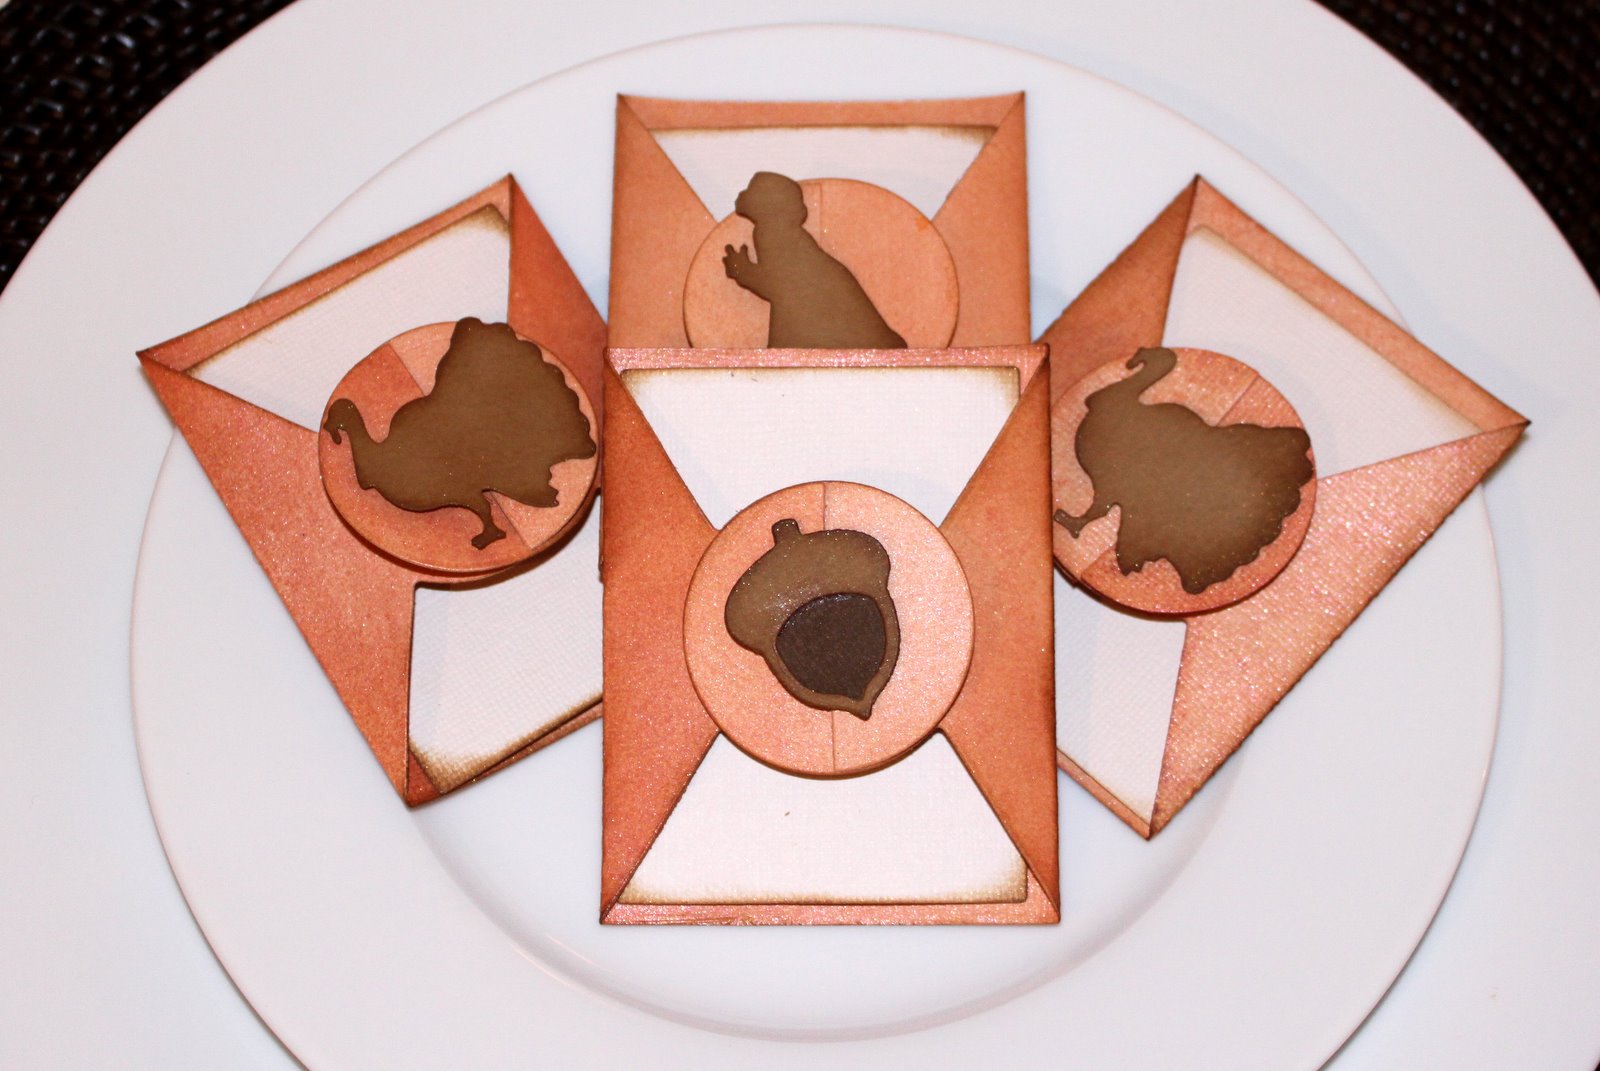
Place Cards
Supplies:
Lifestyle Crafts : PLACE SETTING KIT | Lifestyle Crafts : ACORN | Lifestyle Crafts : TURKEY SILHOUETTE | Bazzill Basics : 12" x 12" Monochromatic Cardstock: BROWN | Bazzill Basics : 12" x 12" Monochromatic Cardstock: VANILLA | Bazzill Basics : 12" x 12" Smoothies Cardstock: KRAFT | Tattered Angels: LIMITED EDITION GLIMMER MIST - 2 oz. spray bottle (Butternut Squash and Rum Punch)

Instructions:
  • Die cut vanilla paper with the Place Setting Kit (both the envelope and card).
  • Spray both sides of the envelope with Tattered Angels Glimmer Mist and let dry.
  • Die cut Thanksgiving images such as the Turkey and Acorn out of Brown and Kraft paper. 
  • Optional: Ink the edges of the card and Thanksgiving images with brown ink.
  •  Fold the envelopes, insert card, and adhere the Thanksgiving images to the front of the envelope.


Napkin Rings

Supplies:
Lifestyle Crafts : FEATHER HEADBAND | Bazzill Basics : 12" x 12" Monochromatic Cardstock: BROWN | Bazzill Basics : 12" x 12" Monochromatic Cardstock: VANILLA | Tattered Angels: LIMITED EDITION GLIMMER MIST - 2 oz. spray bottle (Butternut Squash and Rum Punch) | Tsukineko: Goosebumps Texture Spray - SHIMMER | Prima : SAY IT IN CRYSTALS - PASSION

Instructions:
  • Die cut the largest feather with vanilla cardstock, the smallest feather with brown cardstock, and the headpiece with brown cardstock.
  • Spray the largest feather with Tattered Angels Glimmer Mist and set aside to dry.  Ink the edges with a brown ink pad, if desired.
  • Spray the smallest feather and headpiece with Goosebumps spray to give it a shiny look.
  • Mat the brown headpiece strip to a piece of vanilla cardstock.
  • Wrap the headpiece strip around napkins and adhere the two ends together (leave it a little loose so guests can slide off the napkin holder).  Trim excess. Now you have a napkin ring!
  • Adhere the feathers to the napkin ring.
  • Attach a Prima Crystal to the feathers.


THANKS Jars

Supplies:
K & Company: TIM COFFEY HALLOWEEN & FALL 12X12 DESIGN PAPER PAD | Lifestyle Crafts : SPLENDID  | Bazzill Basics : 12" x 12" Monochromatic Cardstock: BROWN | Lifestyle Crafts : FOLIAGE | Kanban Crafts : DUO MIRROR REFLECTIVE - COPPER/BLACK | Making Memories : SCRAPBOOK EMBELLISHMENT STORAGE JARS - SMALL 6PK | Tim Holtz ADIRONDACK METALLIC MIXATIVES PEARL & COPPER | Tsukineko: Goosebumps Texture Spray - SHIMMER | Tulle

Instructions:
  • Die cut “THANKS” out of Copper paper.
  • Cut strips of paper from the Fall paper pack to wrap around the jars.  Mat the fall paper with brown cardstock on every-other one.
  • Spray strips of paper with Goosebumps to create a shimmer.  Let dry.
  • Die cut Foliage out of brown cardstock and adhere to the jars.
  • Adhere “THANKS” to the jars on top of the foliage.
  • Optional: The tops of these bottles were initially silver, but I wanted them copper to coordinate with the rest of the table.  To fix this, I used alcohol ink to die them copper.


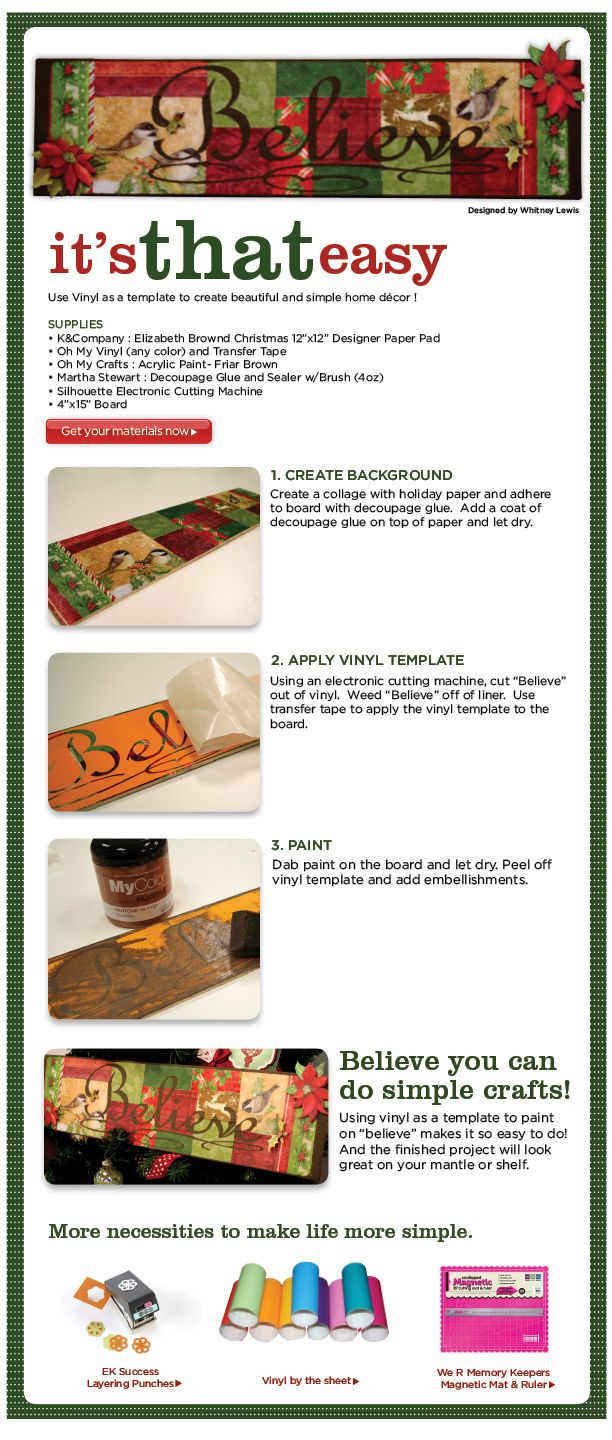
Believe It's That Easy


Cones

Cone Centerpieces
Designed for Oh My Crafts


Supplies Used:

Petersen-Arne : Craft Pedlers Paper Mache Set Cones Tall Kraft Set of 3 | Acrylic Paint - Bright White and Admiral Blue | Doodlebug : Sugar Coating Glitter | Silver Craft Wire | Red, White, Blue and Yellow Cardstock |  Use any of these Cricut Cartridges to cut stars: A Child’s Year, Accent Essentials, Ashlyn’s Alphabet, Celebrations, Doodlecharms, Doodletype, Sesame Street Font, Simply Street, Pagoda, Hannah Montana, Home Décor, Indie Art, or Makin the Grade.


Instructions:
1. Paint the cones with 2-3 coats of red, white, or blue paint.
2. Glitter the cones.
a. If using glitter, apply mod podge or spray adhesive and then sprinkle on glitter.
b. If using spray paint, take outside, spray and let dry.
3. Punch a hole at the bottom of the cone and stick one end of wire into the hole. Bend the wire to secure it inside the cone.
4. Wrap the wire around the cone so it spirals around the cone.
5. Cut stars out of red, white and blue paper with Cricut in various sizes ranging from ¾” to 5”. Embellish with Stickles, Mark Richards Metal Stickers and emboss with embossing folders.
6. Adhere stars to the wire using hot glue or Oh My Crafts: Exclusive Acid Free Craft Tape. These cones have the larger stars at the bottom of the cone and gradually gets smaller at the top.